
Installation and Power Requirements
Connect the washer to a grounded 240‑V outlet, preferably NEMA 14‑30. Verify the power cord is intact and the plug matches the receptacle. Ensure the machine’s grounding wire is attached to the frame. Check for loose connections before powering on to prevent electrical hazards. Check wiring diag!
Electrical Connection and Grounding Requirements for Miele Washers
Before installing a Miele washing machine, verify that the electrical supply meets the manufacturer’s specifications. The machine requires a 240‑V, 50‑Hz or 60‑Hz supply with a minimum 30‑A circuit breaker. A dedicated circuit is mandatory; shared circuits can cause nuisance tripping and compromise safety. The power cord must be in good condition, free of cuts or fraying, and the plug must match the outlet type. Miele recommends a NEMA 14‑30 receptacle for models that support 240 V and 30 A, ensuring both phase and neutral conductors are properly connected. Grounding is critical: the grounding wire of the power cord must be attached to the metal frame of the washer. If the frame is not metal, a separate grounding rod or bonding strap should be used to establish a low‑impedance path to earth. The grounding conductor should be sized according to the National Electrical Code (NEC) to handle fault current. After connecting the cord, inspect the plug for proper orientation and secure the outlet cover. Test the outlet with a voltage tester before powering the machine. If the outlet is not grounded, the machine will not operate and may pose a shock hazard. Finally, ensure that the machine’s internal wiring is intact; any damaged insulation or exposed conductors should be repaired before use. Failure to follow these steps can result in electrical fires, equipment damage, or personal injury. Keep cords dry and outlets clean to avoid short circuits.
Water Supply and Drainage Setup
Connect hot and cold water hoses to the dedicated valves, ensuring the 5‑ft drain hose is secured to the floor drain. Tighten all fittings to prevent leaks. Inspect the drain for clogs before running the machine. Use a hose clamp to keep the connection tight. Check for water pressure compliance. Now
Connecting the 5 ft. Drain Hose and Checking for Leaks
Attach the 5‑ft (1.5 m) drain hose to the machine’s drain outlet, ensuring the hose is free of kinks and bends that could restrict flow. Use a hose clamp or clamp ring to secure the connection firmly; tighten until the clamp is snug but not overtightened to avoid damaging the hose. Position the other end of the hose in a floor drain or a stand‑pipe that is at least 12 inches higher than the washer’s drain outlet to maintain proper gravity flow. Verify that the floor drain is clear of debris and that the drain pipe is free of obstructions. After securing the hose, inspect the entire length for any visible cracks, bulges, or pinholes that could lead to leaks. A quick test involves running a small amount of water through the hose while the machine is off; watch for any dripping or seepage at the connections. If a leak is detected, tighten the clamp further or replace the hose if damage is evident. Once the hose is leak‑free, perform a brief spin cycle to confirm that water is expelled efficiently and that no water remains in the hose or drain pipe. This step also helps to ensure that the drain hose is correctly positioned and that the machine’s internal drainage system is functioning as intended. Proper installation of the drain hose is critical to prevent water damage, maintain efficient operation, and comply with safety guidelines outlined in the Miele operating manual. Failure to secure the hose properly can result in water spillage, electrical hazards, or damage to the surrounding floor and fixtures. Check for leaks after use!!
Control Panel Overview
Use the digital display to select wash programs, temperature, and spin speed. The safety lock prevents door opening during cycles. Press the start button to begin; the timer shows remaining time. Reset by holding the button until the display clears; Press power to exit.
Interpreting the Digital Display and Safety Lock Functions
The Miele digital display provides real‑time feedback for each wash cycle. The top row shows the selected program name, while the middle row displays the current phase (e.g., “Filling,” “Washing,” “Rinsing”). The bottom row indicates the remaining time in minutes and seconds. When a cycle starts, the display automatically switches to the timer mode, and the LED ring around the dial lights up to signal active operation.
The safety lock is a critical safety feature that prevents the door from opening while the drum is in motion. It engages automatically when the cycle begins and disengages only after the final spin and the door has been unlocked. The lock status is indicated by a small lock icon on the display. If the icon remains lit after the cycle ends, it signals a fault that requires inspection. The lock can be manually overridden by pressing the “Lock” button for a few seconds, but this should only be done in emergencies and after consulting the service manual.
- 0:00 – Cycle complete, ready for unloading.
- Err – Generic error; check for obstructions or power issues.
- F – Filter error; clean the filter and retry.
- W – Water supply error; verify inlet valves and hoses.
- H – High temperature warning; reduce cycle temperature.
When the display shows a persistent error code, consult the troubleshooting section. Common fixes include resetting the machine by unplugging for 30 seconds, checking the water inlet for kinks, and ensuring the drain hose is correctly positioned. If the lock icon remains active, inspect the door latch for debris or wear.
Wash Program Selection
Select a wash cycle by pressing the corresponding button. Use the temperature dial to set 30–90°C. Spin speed ranges from 400 to 1400 rpm; higher speeds dry faster. For delicate fabrics, choose “Delicate” or “Hand Wash.” Press “Start” to begin. The machine pauses if the door opens during a cycle immed
Choosing Temperature, Spin Speed, and Special Wash Cycles
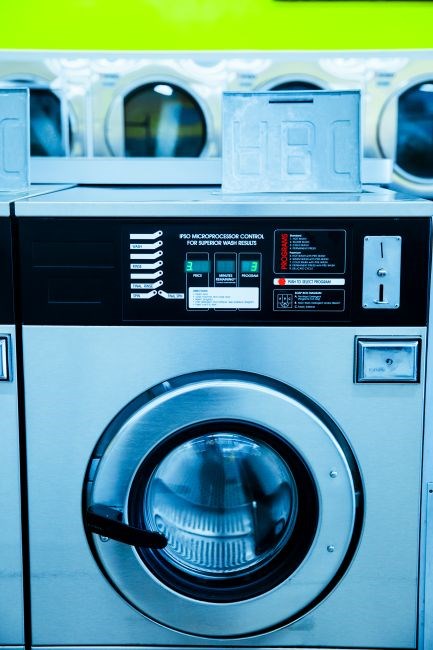
When setting a wash program, first decide the fabric type and soil level. For cottons and linens, a temperature of 60 °C to 90 °C is recommended, while wool and synthetics should stay below 40 °C to prevent shrinkage. The temperature selector is a dial on the front panel; turn it clockwise to increase heat. The spin speed dial ranges from 400 rpm to 1400 rpm. Higher speeds extract more water, shortening drying time but may damage delicate items. Use 800 rpm for everyday cottons, 1200 rpm for heavy towels, and 400 rpm for delicates. The special wash cycles are accessed by pressing the “Special” button. Options include “Delicate,” “Wool,” “Quick Wash,” and “Eco.” “Delicate” uses a gentle drum motion and low spin, “Wool” adds a wool‑specific rinse, “Quick Wash” shortens cycle time for lightly soiled loads, and “Eco” maximizes water efficiency. Always read the garment care label; if it indicates “cold wash only,” set the temperature to 30 °C and choose a low spin. For heavily stained items, select “Stain” or “Intensive” if available, and add a pre‑wash rinse. After setting the parameters, press “Start” and the display will show the remaining time. The machine will automatically adjust water temperature based on the selected cycle, so manual temperature changes are unnecessary during operation. Remember to keep the door closed until the cycle completes to avoid safety lock activation. Proper temperature and spin selection not only protect fabrics but also improve cleaning performance and energy efficiency. The machine will display warning if the selected temperature exceeds allowed for the fabric type!
Detergent and Additive Guidelines
Miele recommends powder detergents for optimal performance; liquid detergents can cause residue buildup. Use the detergent drawer’s powder compartment, measuring the dose per load size. Additives like fabric softener are optional; avoid bleach unless the cycle label permits. Add rinse aid for bright no.
Using Powder Detergents and Avoiding Liquid Detergents for Optimal Performance
Powder detergents are the preferred choice for Miele washers because they dissolve more cleanly in the high‑temperature, high‑spin cycles typical of these machines. Liquid detergents tend to leave a film on the drum and can clog the detergent dispenser, especially when used in hard water regions. To maximize cleaning efficiency, always measure the powder dose with the included measuring cup, placing it directly into the powder compartment of the detergent drawer. If you use a liquid detergent, first dilute it in a small container of water to reduce viscosity, then pour the mixture into the liquid compartment, but this is only recommended for specialty cycles that explicitly allow liquid usage. Avoid over‑loading the drum; excess fabric can trap detergent residue, leading to odor buildup. After each wash, inspect the dispenser for any remaining powder and wipe it clean with a damp cloth. For heavy‑stain loads, add a pre‑wash powder burst to the top of the drum before starting the cycle. The machine’s built‑in water‑temperature control ensures that the powder is fully dissolved, preventing any residue that could affect future cycles. If you notice a persistent film on the drum, run a rinse‑only cycle with a small amount of powder detergent to restore clarity. Regularly check the detergent drawer for signs of wear; replace it if the dispenser door no longer closes properly. By using powder detergents and avoiding liquids, you preserve washer’s components, maintain water‑efficiency, achieve results across cycles.
Operating Sequence and Safety Precautions
Before starting, ensure the door is closed and the lid latch is engaged. Press the start button to initiate the prewash. The machine will cycle through wash, rinse, and spin phases automatically. After completion, wait for the cycle to end before opening the door. Keep hands clear of moving parts and avoid loading the drum to prevent imbalance. If the machine displays an error code, refer to the manual for troubleshooting. Always unplug the unit during maintenance.
Pre‑Start Checklist and Immediate Steps After Powering On
Before turning the power on, verify that the water inlet valves are open and the hoses are securely attached. Check the drain hose for kinks and ensure it is positioned above the floor to avoid backflow. Inspect the power cord for damage and confirm the plug matches a grounded 240‑V outlet. Load the drum no more than 80 % full, and place detergent in the designated compartment. Set the desired cycle, temperature, and spin speed. Once the cabinet is closed, press the power button to illuminate the digital display. The machine will perform a self‑diagnostic; if the display shows a green checkmark, the system is ready. If an error code appears, pause the cycle and consult the troubleshooting guide. During the first cycle, watch for any water leaks at the inlet or drain connections, and listen for abnormal noises that may indicate a mechanical issue. After the cycle completes, allow the door latch to engage fully before opening the door to prevent water spillage. Always unplug the unit if maintenance is required.
Always use powder detergents. Keep the detergent compartment dry to prevent mold. After each wash, wipe the door seal with a damp cloth and allow it to air dry. If the machine displays a 0x error code, refer to the service manual for detailed diagnostics. Regularly inspect the drain hose for kinks or clogs and replace it if necessary. Ensure the machine is level by adjusting the feet and check that the door latch engages securely. Remember to clean the filter monthly maintain efficiency. Schedule annual checks with certified tech.
Maintenance and Cleaning Routines
Clean the drum, filter, and door seal weekly to prevent odors. Remove the filter, rinse under running water, and wipe the drum with a damp cloth. Inspect the door seal for cracks, clean with mild detergent, and dry thoroughly. Replace the filter after each wash. Keep the filter dry and replace yearly
Routine Cleaning of Drum, Filter, and Door Seal to Prevent Odors
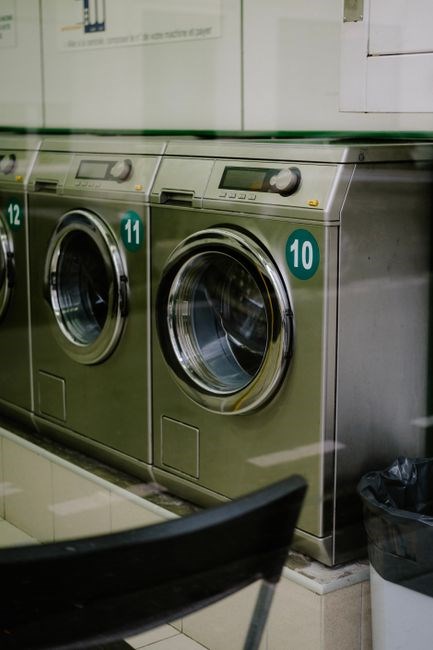
Regular cleaning of the drum, filter, and door seal is essential for maintaining a fresh‑smelling Miele washing machine. Begin by opening the door and locating the filter at the bottom front of the machine. Remove the filter carefully, rinse it under hot running water, and scrub away any lint or residue with a soft brush. Replace the filter securely before closing the door.
Next, wipe the interior drum with a damp microfiber cloth. For stubborn stains, mix a small amount of mild detergent with warm water and apply the solution to the drum surface. Gently scrub in circular motions, then rinse with a clean cloth to remove detergent residue. Avoid using harsh chemicals that could damage the drum’s finish. Remember to replace the filter annually for optimal performance and keep drum dry!!.
Inspect the rubber door seal for cracks, mold, or buildup. Use a soft brush or a cotton swab dipped in a vinegar‑water solution (50/50) to clean the seal thoroughly. This solution helps eliminate bacteria and mildew that cause odors. After cleaning, dry the seal with a clean towel to prevent moisture accumulation.
Finally, run an empty hot‑water cycle with a cup of white vinegar or a specialized washing‑machine cleaner. This step removes mineral deposits and neutralizes any lingering smells. After the cycle completes, wipe the door and surrounding area with a dry cloth. Consistent maintenance will keep the machine odor‑free and extend its lifespan.
Troubleshooting Common Issues
Check error codes on the display, refer to the manual for code meanings. Verify power and water supply. Inspect hoses for kinks or leaks. Clean the filter regularly. If problems persist, contact Miele service. Keep the machine level and secure. Check seals and!
Decoding Error Codes and Fixing Mechanical Problems
When a Miele washer shows an error, refer to the back panel chart. Common codes like F01 (door lock) or F02 (motor overload) pinpoint issues. Reset by powering off 30 s, then on; many errors clear.
Inspect the drive belt for wear; a loose belt triggers F07. Replace with the correct belt, ensuring tension. Check drum rollers for debris; clogged rollers cause F08. Clean rubber seals around the door and drain pump; If the code persists after a reset, check the door latch for engagement.
For water problems, run a short cycle with valves open. F03 indicates low pressure; clean filter screens or replace valves. F04 means high pressure; inspect the relief valve and hose for kinks. Also verify that the belt is not twisted and that the pulleys are aligned.
Electrical checks: use a multimeter on motor windings; a broken winding gives F05. Verify the board’s 24 V supply; a missing signal produces F06. Dry any moisture with compressed air and reseal the enclosure. If the pressure remains abnormal, replace the pressure relief valve.
If the board shows a fault, inspect the solder joints for cracks. If the manual steps do not resolve the issue, contact Miele support for a service order now.